Showing posts with label cooking. Show all posts
Showing posts with label cooking. Show all posts
Thursday, July 11, 2013
Sizzlin' Summer Recipes with @CrosbysMolasses!
Summertime is BBQ season, kick back on the patio with a cold beverage season, and I-really-don't-want-to-turn-on-the-oven-let's-have-watermelon-or-salad-for-supper-instead season!

In my quest to try new-to-me recipes, I wanted to incorporate molasses into some of my dishes. Why? Well, being Asian, I didn't exactly grow up using molasses in my food as a kid, and I am now married to a farmer whose mom uses molasses in her dishes. There's a certain level of curiosity and also the want for a challenge, and that exciting challenge is cooking with molasses!
Sure, I can make a great gingersnap cookie with molasses, but I want to use it in BBQ recipes and things one wouldn't think to use molasses in!


In my quest to try new-to-me recipes, I wanted to incorporate molasses into some of my dishes. Why? Well, being Asian, I didn't exactly grow up using molasses in my food as a kid, and I am now married to a farmer whose mom uses molasses in her dishes. There's a certain level of curiosity and also the want for a challenge, and that exciting challenge is cooking with molasses!
Sure, I can make a great gingersnap cookie with molasses, but I want to use it in BBQ recipes and things one wouldn't think to use molasses in!

I came across some Sizzlin' Summer Recipes with Crosby's Molasses!
First up - Iced Chai! I'm a sucker for chai and lovely cool beverages on a hot Summer day! I was perusing Crosby's Molasses' blog, Molasses and More and found out that they have some FREE e-books with tons of molasses recipes!
This recipe in Crosby's Molasses Iced Chai recipe is divine!

1 cup milk (can substitute nut or soy milk)
1 tea bag chai tea
2 tsp Crosby's Fancy Molasses
1 tsp cinnamon
6-8 ice cubes
(makes generous serving)
Place milk and tea bag in a small pot and bring to a simmer. Remove from heat and let steep for 5 minutes, pressing down on tea bag with a spoon a few times.
Remove tea bag from milk, transfer to a blender, add cinnamon. molasses, and ice cubes. Whirr until it's slushy and a little foamy. Transfer to a glass and garnish with a sprinkling of cinnamon.
Both my husband and our 4 year old daughter love ribs! When I saw this recipe for Finger-Licking Oven Ribs in Crosby's The BBQ Book, I just had to make it!
The verdict? See for yourself?

No dinner would be complete without a tasty side dish! My family loves a good cabbage salad or coleslaw. The Carrot and Cabbage Slaw with Orange and Molasses Dressing looked interesting! I had to try it out!

Next week, I'm making the Molasses Glazed Grilled Shrimp and a salad with Molasses Herb Vinaigrette!
I'm really excited to have discovered the Molasses and More blog and Crosby's FREE e-books!
All of the recipes I featured on this blog can be found in Crosby's The BBQ Book.

Friday, April 12, 2013
Country Living - Favourite Recipes @LifeMadeDelish #LMDConnector
Many people who live with the hustle and bustle of busy city dwelling always tell me how much they love heading to the cottage on Summer weekends. For me, I've left the city and have through some strange turns of events, ended up embracing a life of country living.
Glorious sunrises and Monet-like sunsets, cattle grazing on green pastures, and afternoons at the beach are all part of our every day.
What kinds of meals and snacks are our favourites for country living? Homemade biscuits, homemade chocolate pudding, and Crocodile Pie are some family favourites. Hubby and Little One know that I like to limit our sugar consumption, so I only make desserts (like puddings, pies, cakes, cheesecakes, tarts, muffins, cupcakes, or cookies) on special occasions. Sweets are meant as a treat for every once in a while. Lucky for me, casseroles and salads of all sorts are also high on the list of things my family loves to eat.
If you're at all familiar with country living, you'll know that using what ingredients are local and readily available dictates what kind of meals you will likely prepare.
Because we have an abundance of raspberries, apples and rhubarb on our farm, I have to figure out as many ways of using them in recipes.

Raspberry-Apple-Rhubarb Pie
aka Crocodile Pie (I don't know why it's called that, but that's what my Mother-in-law told me it was called)
Ingredients
2 cups all purpose flour
Directions
1. In a medium bowl stir together the 2 cups all-purpose flour and salt. Using a pastry blender or two knives, cut in the shortening until pieces are pea-size.
2. Sprinkle 1 tablespoon cold water over part of the mixture; gently toss with a fork. Push moistened dough to sides of bowl. Repeat, using 1 tablespoon cold water at a time, until all of the dough is moistened.
3. Divide dough in half. Form each half into a ball.
4.On a lightly floured surface, roll half of the pastry into a 12-inch circle, line a 9-inch pie plate with pastry.
5. Trim pastry 1/2 inch beyond edge of pie plate. Fold under extra pastry.
6. Line pastry with double thickness of foil. Bake in a 450 degree F oven for 8 minutes. Remove foil and bake for 5 to 6 minutes more or until golden brown.
7. Cool on a wire rack. On a lightly floured surface, roll remaining pastry into a 12-inch circle.
8. Using a 2- to 3-inch cutter, cut pastry into desired shapes(leaves are a nice choice), cover cutouts loosely; set aside. I used snowflake cutters from Watkins, but Hubby said they looked more like stars when they came out.
9. Meanwhile, in a large saucepan stir together the sugar, cornstarch, and 2 tablespoons flour and stir in rhubarb, raspberries, and apple.
10. Cook over low heat, stirring frequently, until fruit begins to juice out then increase heat to medium and cook and stir over medium heat until thickened and bubbly.
11. Transfer to the baked pie shell. Brush edge of pie with milk and place pastry cutouts over fruit filling and around the edge of the pie.
12. Brush pastry cutouts with milk and, if desired, sprinkle with sugar.
13. Bake in a 375 degree F oven about 25 minutes or until pastry is golden brown, cool on a wire rack. Makes 8 servings.

Glorious sunrises and Monet-like sunsets, cattle grazing on green pastures, and afternoons at the beach are all part of our every day.
What kinds of meals and snacks are our favourites for country living? Homemade biscuits, homemade chocolate pudding, and Crocodile Pie are some family favourites. Hubby and Little One know that I like to limit our sugar consumption, so I only make desserts (like puddings, pies, cakes, cheesecakes, tarts, muffins, cupcakes, or cookies) on special occasions. Sweets are meant as a treat for every once in a while. Lucky for me, casseroles and salads of all sorts are also high on the list of things my family loves to eat.
If you're at all familiar with country living, you'll know that using what ingredients are local and readily available dictates what kind of meals you will likely prepare.
Because we have an abundance of raspberries, apples and rhubarb on our farm, I have to figure out as many ways of using them in recipes.
Raspberry-Apple-Rhubarb Pie
aka Crocodile Pie (I don't know why it's called that, but that's what my Mother-in-law told me it was called)
Ingredients
2 cups all purpose flour
1/2 teaspoon of salt
2/3 cup shortening
6-7 tablespoons of cold water
1 1/4 cups sugar
3 tablespoons cornstarch
2 tablespoons all purpose flour
4 cups chopped fresh or frozen rhubarb
2 cups fresh or frozen raspberries
1 medium cooking apple, peeled and shredded (about 3/4 cup)
1-2 tablespoon of milk
2/3 cup shortening
6-7 tablespoons of cold water
1 1/4 cups sugar
3 tablespoons cornstarch
2 tablespoons all purpose flour
4 cups chopped fresh or frozen rhubarb
2 cups fresh or frozen raspberries
1 medium cooking apple, peeled and shredded (about 3/4 cup)
1-2 tablespoon of milk
2-3 tablespoons sugar (optional)
Directions
1. In a medium bowl stir together the 2 cups all-purpose flour and salt. Using a pastry blender or two knives, cut in the shortening until pieces are pea-size.
2. Sprinkle 1 tablespoon cold water over part of the mixture; gently toss with a fork. Push moistened dough to sides of bowl. Repeat, using 1 tablespoon cold water at a time, until all of the dough is moistened.
3. Divide dough in half. Form each half into a ball.
4.On a lightly floured surface, roll half of the pastry into a 12-inch circle, line a 9-inch pie plate with pastry.
5. Trim pastry 1/2 inch beyond edge of pie plate. Fold under extra pastry.
6. Line pastry with double thickness of foil. Bake in a 450 degree F oven for 8 minutes. Remove foil and bake for 5 to 6 minutes more or until golden brown.
7. Cool on a wire rack. On a lightly floured surface, roll remaining pastry into a 12-inch circle.
8. Using a 2- to 3-inch cutter, cut pastry into desired shapes(leaves are a nice choice), cover cutouts loosely; set aside. I used snowflake cutters from Watkins, but Hubby said they looked more like stars when they came out.
9. Meanwhile, in a large saucepan stir together the sugar, cornstarch, and 2 tablespoons flour and stir in rhubarb, raspberries, and apple.
10. Cook over low heat, stirring frequently, until fruit begins to juice out then increase heat to medium and cook and stir over medium heat until thickened and bubbly.
11. Transfer to the baked pie shell. Brush edge of pie with milk and place pastry cutouts over fruit filling and around the edge of the pie.
12. Brush pastry cutouts with milk and, if desired, sprinkle with sugar.
13. Bake in a 375 degree F oven about 25 minutes or until pastry is golden brown, cool on a wire rack. Makes 8 servings.
This Crocodile Pie is always a crowd pleaser. It's so pretty and is a hit at any party, picnic, BBQ or potluck. It's the perfect dessert to bring when going to a friend's house for dinner. To me, when I think of pies like this one, it reminds me of good 'ol country living.
If you're looking for inspiration for quick and easy recipes for the cottage, check out the Life Made Delicious website! They've got tons of great recipes to choose from! Who knows? Maybe one day, my Crocodile Pie recipe will make it on there! A girl can dream, right? :)
What foods or dishes remind you of country living or Summers at the cottage?
What foods or dishes remind you of country living or Summers at the cottage?
Disclosure: I am part of the Life Made Delicious Blogger program and
I receive special perks as part of my affiliation with this group. The
opinions on this blog are my own.
Thursday, April 11, 2013
BBQ'd Beef Roast ~ Manitoulin Shawarma
Being married to a beef farmer, it comes to no surprise that my husband and 4 year old daughter both love their beef. Roasts are among their favourites.
This recipe is not your standard roast recipe. Normally, I cook my roasts in the oven or BBQ. This method is a bit unusual, but oh-so-tasty and oh-so-fun!
BBQ'd Beef Roast ~ "Manitoulin Island Shawarma"
Ingredients:
Beef shoulder cut
1 large onion (the size of a softball)
vegetable or cooking oil
salt, pepper, garlic powder (or whatever spices you wish)
1/2 quart beef broth (I made my beef broth, but you can use store-bought if you want)
4 cloves of garlic
Instructions:
Slice roast into thin cuts. Drizzle oil over meat. Rub spices over meat.
Cut onion into 3 thick slices.


Take 2 long metal BBQ skewers. On 1 BBQ skewer, thread meat and then 1 slice onion. Repeat twice (meat slices and onion). Take the other skewer, and from the other end, thread through the meat slices and onion slices to give some stability (so it's not flimsy when you sear it on the BBQ).


On BBQ, sear all sides (about 1-2 minute per side).
In a baking pan (one that can go on the BBQ), add your beef broth and your 4 cloves of garlic.
put roast in the pan with the broth (jus).
Cook indirect at 300 degrees F. Cook it low for about 10 minutes or until meat is cooked through, yet moist and juicy.
Flip roast around. Braise and baste in garlic jus.


Once your meat is cooked, remove from BBQ. To serve, hold skewer and with a sharp knife, make thin cuts. The way this looks reminds me of Shawarma. When you slice, you'll get lovely thin slices of BBQ'd beef and onion.

 Take your garlic jus and pour it over your meat.
Serve a heaping pile of BBQ beef onto a nice bun. You can add some shredded cheese on top if you like.
I grilled some red pepper and zucchini on the BBQ and served that as a topping.


This is meant to go in a sandwich, but if you're not a bread eater, BBQ some sliced sweet potato and have the grilled zucchini and red pepper as a side dish.


So delicious and a different way to cook beef on the BBQ.

This recipe is not your standard roast recipe. Normally, I cook my roasts in the oven or BBQ. This method is a bit unusual, but oh-so-tasty and oh-so-fun!
BBQ'd Beef Roast ~ "Manitoulin Island Shawarma"
Ingredients:
Beef shoulder cut
1 large onion (the size of a softball)
vegetable or cooking oil
salt, pepper, garlic powder (or whatever spices you wish)
1/2 quart beef broth (I made my beef broth, but you can use store-bought if you want)
4 cloves of garlic
Instructions:
Slice roast into thin cuts. Drizzle oil over meat. Rub spices over meat.
Cut onion into 3 thick slices.


Take 2 long metal BBQ skewers. On 1 BBQ skewer, thread meat and then 1 slice onion. Repeat twice (meat slices and onion). Take the other skewer, and from the other end, thread through the meat slices and onion slices to give some stability (so it's not flimsy when you sear it on the BBQ).


On BBQ, sear all sides (about 1-2 minute per side).
In a baking pan (one that can go on the BBQ), add your beef broth and your 4 cloves of garlic.
put roast in the pan with the broth (jus).
Cook indirect at 300 degrees F. Cook it low for about 10 minutes or until meat is cooked through, yet moist and juicy.
Flip roast around. Braise and baste in garlic jus.


Once your meat is cooked, remove from BBQ. To serve, hold skewer and with a sharp knife, make thin cuts. The way this looks reminds me of Shawarma. When you slice, you'll get lovely thin slices of BBQ'd beef and onion.


Serve a heaping pile of BBQ beef onto a nice bun. You can add some shredded cheese on top if you like.
I grilled some red pepper and zucchini on the BBQ and served that as a topping.


This is meant to go in a sandwich, but if you're not a bread eater, BBQ some sliced sweet potato and have the grilled zucchini and red pepper as a side dish.


So delicious and a different way to cook beef on the BBQ.

Monday, April 08, 2013
Filipino BBQ #Recipe
My Mom's BBQ has always been a favourite in our family. Friends who have tried my Mom's Filipino BBQ have always wanted her to bottle the recipe and sell it! Mom never gave out her recipe, but would tell them what the ingredients were.


I used to think she never gave out her recipe because she didn't want anyone to know it or be able to reproduce it, but I've come to realize that there is no real recipe. She just goes by taste.
I've tried out a few recipes and have come up with one that is a hit! My husband and four year old daughter pretty much inhale this Filipino pork BBQ!

Filipino BBQ
Ingredients:
2 lbs pork
1 c. soy sauce
1 whole garlic, peeled, smashed, and minced
1 onion, minced
2 lemons
1/2 c. 7-Up
1 tsp freshly ground black pepper
5 tbsp brown sugar
1 c. Mafran filipino banana sauce (Jufran or UFC are okay, but I prefer Mafran) *If you can't get filipino banana sauce, you can use ketchup
1/2 c smooth peanut butter (optional)
Instructions:
Cut pork into bite sized cubes (about 2 inches)
In a large container or tupperware, add soy sauce, garlic, onion, juice of 2 lemons, ground pepper, brown sugar, 7-Up, Mafran and peanut butter. Mix marinade well.
Add pork to the marinade, seal container and refrigerate overnight. The longer you marinate it, the better the flavour!
Soak bamboo skewers in water.

I actually used 1 lb pork and 1 lb beef because that's what I had handy. I have to admit that I though the BBQ tastes amazing with either choice of meat, I love the pork version best. I've even tried this with venison. The marinade is what makes it! Clearly, the secret is in the sauce!
After you have marinated your meat, take a bamboo skewer and "tuhog" the meat. Tuhog means skewer/BBQ stick in Cebuano (a Filipino dialect). I remember as a kid, my mom would always ask me to "tuhog" the meat when we had parties. To this day, every time I make Filipino BBQ, I remember all the family parties and it brings back fond memories. It's kind of like a rite of passage. My 4 year old wanted to help me, but I was worried she'd get splinters or pierce her fingers with the skewers. She assisted me in the kitchen by adding the ingredients to the marinade after I minced, cut, chopped, and measured.

Once you've put all the meat onto skewers, cook them on the BBQ until fully cooked.

Enjoy! This is one of our favourites!
Monday, April 01, 2013
Maple BBQ Ribs #recipe
This time of the year is especially fun on the farm because it's maple syrup making time! This year the run has been a great one and the trees are yielding a lot of sap. There's nothing more delicious than the sweet, smokey flavour of homemade maple syrup!


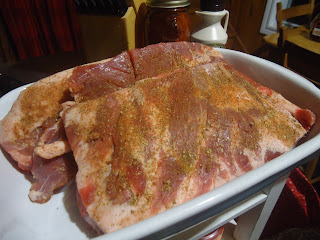


Maple syrup time has prompted many new recipes and resurrected many family favourites.

Maple BBQ Ribs
Ingredients:
Pork ribs
Dry rub of your favourite pork rub spices (you can buy or make your own)
* My pork rub spices consist of: salt, freshly ground black pepper, cinnamon, paprika, garlic powder, onion powder, and a few different herbs)
maple syrup
hot sauce
apple juice (about 1/2 c per rack)
Instructions:
Trim fat from ribs and with a sharp knife, score the meaty part of the ribs.


Rub in your pork rub and wrap in plastic wrap. Let rub sit a few hours or overnight. I do mine for overnight so all the flavours really set.
Sear on BBQ. Once racks are seared, remove from grill.


Take some aluminum/tin foil and wrap each rack of rib and add 1/2 a c of apple juice per rack.


Put "packets" back on BBQ. Cook on grill until meat is completely cooked.
In a pot (if you have an element to cook on or boil sauce in a pot, that's perfect), make a jus with the pork fat and apple juice from each foil packet, 1/2 to 3/4 c maple syrup, salt, hot pepper sauce (if you don't have hot pepper sauce, you can use 1/3 tsp cayenne pepper.

Baste ribs with sauce/jus. When the meat is cooked, tender and about to fall off the bone, it's time to enjoy!
Thursday, March 07, 2013
Watch.Learn.Cook with @CanadianBeef #loveCDNbeef

We learn about food, our culture and how to cook by watching our parents cook. Well, in most cases that is where our earliest introduction with cooking comes from.
I remember as a very young child, going to my grandparents' house after school and my grandfather would be watching cooking shows. Long before I became a FoodNetwork junkie, I was a Ken Kostick and Mary Jo Eustace What's For Dinner fan.
My brothers, cousins and I would always hang out in the kitchen while our grandparents taught us how to cook Filipino food. We'd loiter in the kitchen under the guise of actually wanting to learn how to cook, when in reality, we just wanted to sample all their yummy food. My grandparents were both fabulous cooks.
I say we learn about food by watching our parents (or grandparents) in the kitchen. Now I find myself watching FoodNetwork or even YouTube videos! How about Pinterest? If I need a recipe, I just Google it and pray there's a video!
Canadian Beef has wowed me with their amazing videos. So easy to follow!
I have to say that I only really started cooking when I first lived on my own. With parents and grandparents who were amazing cooks, I never had to really put into practice what I learned. I failed miserably when I first started on my own. The fear of not being able to cook meat properly was something that stressed me out. When Hubby and I were in our first year of marriage, I was so stressed out about cooking for my mother-in-law.
Who cooks a roast beef better than a beef farmer's wife? I couldn't even make my own pie crusts, let alone cook the perfect roast! I had tremendous anxiety cooking beef for my beef farmer mother-in-law. Turns out she loves my cooking. I still wish I had Canadian Beef recipes, tips, and videos back then!
Check out this video on "How to Make the Perfect Pot Roast".
Apart from steak, this next one is my husband's favourite way to have beef. He loves a good oven roast. Can you tell I'm addicted to all the Canadian Beef "how to" videos?
If you grew up watching Julia Child, you know you've always wanted to learn how to make the perfect Boeuf Bourguignon! Never fear, Canadian Beef is here!
With Mother's Day and Easter coming up, I know my husband is going to ask me to make one of the above recipes (most likely the oven roast)!
It's interesting how as I prepare to end this post, we come full circle. I began talking about how as a child, I watched and learned as my grandparents cooked their dishes from their home country of the Philippines. Now that my daughter is four years old, she is now learning how to cook and often acts as my very capable Sous Chef!


If you're teaching your kids how to cook, these Canadian Beef videos will come in handy!
Canadian Beef has more exciting news for you!
Canadian Beef has partnered with Eat In Eat Out Magazine. Check it out! I read every page, as there were so many amazing recipes included. Of course, my lots of great beef tips too! You can follow them on Twitter at @EatInEatOutMag.
WIN 1 of 5 Canadian Beef iPad4 Prize Packs!

EACH prize pack consisting of one (1) 32GB Apple iPad4 (Wi-Fi with Retina Display), one (1) remote talking thermometer, + one (1) cooler tote per qualified winner. Approximate retail value of EACH prize pack is CD$770.00. Limit of one (1) prize per person/email address.
Enter Contest here.
Disclosure -
Wednesday, March 06, 2013
Homemade Wonton Soup
Every now and then, I get a hankering for some good 'ol wonton soup. My Dad taught me how to make wontons, and a few nights ago, I taught Hubby and Little One how!

I have to say that I sounded like a nag because they were doing the "Oh, we don't want to help. Can't you just make them?"
I actually pulled out the "Haven't you heard about the chicks who didn't want to help their mom bake bread? If you don't help, you don't eat!" Oh, I can't remember if that's how the story even went. My memory is fuzzy, but I remember hearing a story similar to that. My grandma and grandpa used to tell us that story.
I may have also pulled the "Many hands make light work" proverb too.
Anyway, I thought it was an opportune time to spend quality family time together. I also thought that if Hubby knew how to make this dish, he could make it on his own sometime!
{ HOMEMADE WONTON SOUP }
Ingredients:
Original recipe
1/2 lb ground pork
2 oz shrimp, chopped
1 tbsp rice wine
1 tbsp soy sauce
green onion, chopped
3-4 c chicken stock
1 pkg of 24 wonton wrappers (3.5 in squares)
sesame oil
grated ginger
My version:
I didn't have shrimp or pork, so I substituted with ground beef. I know, not the same. We live on a beef farm, so I used what we had!
1 lb ground beef
1 tbsp rice wine
1 tbsp soy sauce
2 cloves garlic, finely chopped
1 small onion, finely chopped
4 c homemade chicken stock
1 pkg of wonton wrappers
sesame oil
*I completely forgot about the ginger!
Instructions:


Little One was so excited to eat her wonton soup because she made it!
Do your kids help out in dinner preparation and cooking?

I have to say that I sounded like a nag because they were doing the "Oh, we don't want to help. Can't you just make them?"
I actually pulled out the "Haven't you heard about the chicks who didn't want to help their mom bake bread? If you don't help, you don't eat!" Oh, I can't remember if that's how the story even went. My memory is fuzzy, but I remember hearing a story similar to that. My grandma and grandpa used to tell us that story.
I may have also pulled the "Many hands make light work" proverb too.
Anyway, I thought it was an opportune time to spend quality family time together. I also thought that if Hubby knew how to make this dish, he could make it on his own sometime!
{ HOMEMADE WONTON SOUP }
Ingredients:
Original recipe
1/2 lb ground pork
2 oz shrimp, chopped
1 tbsp rice wine
1 tbsp soy sauce
green onion, chopped
3-4 c chicken stock
1 pkg of 24 wonton wrappers (3.5 in squares)
sesame oil
grated ginger
My version:
I didn't have shrimp or pork, so I substituted with ground beef. I know, not the same. We live on a beef farm, so I used what we had!
1 lb ground beef
1 tbsp rice wine
1 tbsp soy sauce
2 cloves garlic, finely chopped
1 small onion, finely chopped
4 c homemade chicken stock
1 pkg of wonton wrappers
sesame oil
*I completely forgot about the ginger!
Instructions:
- In large bowl, combine pork, shrimp, rice wine, soy sauce, green onion, and mix well. I didn't have those, so I combined the ground beef, garlic, onion, rice wine, soy, and sesame oil.
- Separate wonton wrappers and in the centre of each wonton, place 1/2 to 1 tsp of meat mixture.
- Moisten the edges with water and fold in half (like a triangle). Bring corners together, press and pinch sealed.
- Continue the above steps until you've finished wrapping all your wontons.
- Bring chicken stock to a boil.
- In a separate pot, bring about 5 to 6 cups of water to a rolling boil. Carefully drop wontons in and cook until wontons float to the top. This should take approx. 5 minutes.
- Remove wontons and place into broth.
- Garnish with chopped scallions/green onion (I didn't have any) and you can drizzle a bit of soy and sesame if you want to adjust the taste.
We had a little assembly line going. We had a "Meat Dropper", an "Edge of the Wrapper Wetter" and a "Purse Folder".

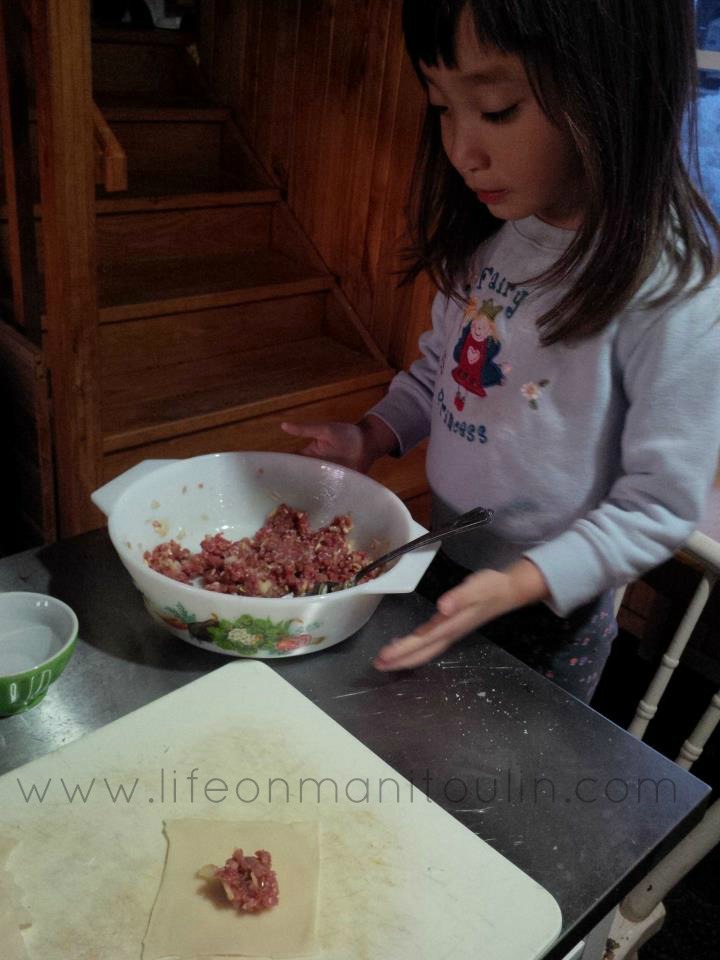

It was a lot of fun!
With everyone involved in the making of our dinner, it tasted even better!

Little One was so excited to eat her wonton soup because she made it!
Do your kids help out in dinner preparation and cooking?
Tuesday, March 05, 2013
Why This Mom Loves @Squishysnakpak!
I have something to tell you that may cause you some alarm. My Little One loves her veggies. My four year old loves food. Period.
She is a meat eater, veggie monster, fruit lover...and has adventurous taste when it comes to food. She loves international cuisine. Yet, she tells me with a sad face that her friends don't like vegetables and "they say veggies are GWOSS!"
That makes me really sad.
I've tried to make her meals seem like meals her peers get, without going the high sodium, high sugar, packaged food route. A treat would be a serving of cheese that she can unwrap. I really do think it's the packaging and having something to unwrap that she wants. She doesn't ever eat the stuff I buy her when she pleads with me because that's what her friends get. She leaves it untouched and says she wants "Mama's cooking".
I was so happy to cross paths with Squishy Snak Pak on Twitter back in January! It was rather serendipitous!

Squishy Snak Pak is a snack container that you fill from the bottom and squish out the top. It's made from BPA-free materials and has a choke-proof cap.The best thing about this product (in my opinion) is the fact that you can wash it and reuse it again and again! This is important to me because I do the whole "litterless lunch" thing with Little One's school lunches.

Squishy Snak Pak is perfect because it's safe, reusable, convenient, and it "looks" like a fun "packaged" food product. Little One won't feel left out because she's not getting all that pre-packaged stuff, and she'll still be getting food that Mama makes. Don't get me wrong. I'm not super militant about the food she gets. She can have treats once in a while, but when it becomes habit or an every day thing, that's when I have issues.
Check out the Squishy Snak Paks! I love that there's a window so you can see what's in there!

The Snak Pak on the left has an orange and peach Greek yogurt smoothie and the one on the right has a Beet-pomegranate-apple-blueberry-sweetpotato-Greek yogurt smoothie.

{Beet-Pomegranate-Apple-Blueberry-Sweetpotato-Greek Yogurt Smoothie}
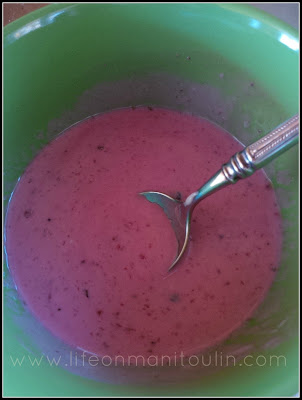
Ingredients:
1 beet
1/2 c pomegranate seeds
1 apple
1/2 c blueberries
1/2 a sweetpotato
1.5 c plain Greek yogurt
Honey to taste (if you wish)
Instructions:
You can either use an electric juicer and juice all of the above fruits and veggies and then blend well with the yogurt and honey OR you can cook and puree the vegetables and fruit and mix the yogurt and honey with that. If you have a juicer, I recommend juicing. We love all the vitamins and minerals raw veg can give you.
If juicing, wash and scrub the veg, but do not peel the skin. The skin is full of nutrients and flavour. Just wash, cut into strips to fit into your juicer, and juice the sweet potato and beets. For added sweetness, you can also juice 1 carrot for this recipe. I didn't do it this time, but carrot and apple make a really sweet combination.
If you decide to cook the vegetables and fruit, this recipe makes a lovely puree for babies.

What I love about the Squishy Snak Paks is that you can add your baby's favourite pureed combinations and it holds up to 1/2 a cup and can be packed in a lunch bag or insulated diaper bag compartment for on the go!
They're even great for freezer storage of portioned baby food made by Mom!
Little One LOVES her Squisky Snak Paks and so does her Mommy!

For more information, visit the Squishy Snak Pak website. Connect with them on Twiiter and Facebook too!
Disclosure -We received the above items to facilitate this honest review. All thoughts and opinions expressed on this blog are honest and my own.
She is a meat eater, veggie monster, fruit lover...and has adventurous taste when it comes to food. She loves international cuisine. Yet, she tells me with a sad face that her friends don't like vegetables and "they say veggies are GWOSS!"
That makes me really sad.
I've tried to make her meals seem like meals her peers get, without going the high sodium, high sugar, packaged food route. A treat would be a serving of cheese that she can unwrap. I really do think it's the packaging and having something to unwrap that she wants. She doesn't ever eat the stuff I buy her when she pleads with me because that's what her friends get. She leaves it untouched and says she wants "Mama's cooking".
I was so happy to cross paths with Squishy Snak Pak on Twitter back in January! It was rather serendipitous!

Squishy Snak Pak is a snack container that you fill from the bottom and squish out the top. It's made from BPA-free materials and has a choke-proof cap.The best thing about this product (in my opinion) is the fact that you can wash it and reuse it again and again! This is important to me because I do the whole "litterless lunch" thing with Little One's school lunches.

Squishy Snak Pak is perfect because it's safe, reusable, convenient, and it "looks" like a fun "packaged" food product. Little One won't feel left out because she's not getting all that pre-packaged stuff, and she'll still be getting food that Mama makes. Don't get me wrong. I'm not super militant about the food she gets. She can have treats once in a while, but when it becomes habit or an every day thing, that's when I have issues.
Check out the Squishy Snak Paks! I love that there's a window so you can see what's in there!

The Snak Pak on the left has an orange and peach Greek yogurt smoothie and the one on the right has a Beet-pomegranate-apple-blueberry-sweetpotato-Greek yogurt smoothie.

The design is also fun and gender-neutral. It's really cute, and like I said, Little One thinks she's having a fun packaged snack like her friends, but it's actually chock full of goodness!
This is what I've done with our Squishy Snak Paks:

Ingredients:
1 beet
1/2 c pomegranate seeds
1 apple
1/2 c blueberries
1/2 a sweetpotato
1.5 c plain Greek yogurt
Honey to taste (if you wish)
Instructions:
You can either use an electric juicer and juice all of the above fruits and veggies and then blend well with the yogurt and honey OR you can cook and puree the vegetables and fruit and mix the yogurt and honey with that. If you have a juicer, I recommend juicing. We love all the vitamins and minerals raw veg can give you.
If juicing, wash and scrub the veg, but do not peel the skin. The skin is full of nutrients and flavour. Just wash, cut into strips to fit into your juicer, and juice the sweet potato and beets. For added sweetness, you can also juice 1 carrot for this recipe. I didn't do it this time, but carrot and apple make a really sweet combination.
If you decide to cook the vegetables and fruit, this recipe makes a lovely puree for babies.

What I love about the Squishy Snak Paks is that you can add your baby's favourite pureed combinations and it holds up to 1/2 a cup and can be packed in a lunch bag or insulated diaper bag compartment for on the go!
They're even great for freezer storage of portioned baby food made by Mom!
Little One LOVES her Squisky Snak Paks and so does her Mommy!

For more information, visit the Squishy Snak Pak website. Connect with them on Twiiter and Facebook too!
Disclosure -We received the above items to facilitate this honest review. All thoughts and opinions expressed on this blog are honest and my own.
Subscribe to:
Posts (Atom)
From Our Farm to Your Table

Farmers Feed Cities

You Can Find Me Here!


Affiliates
 |
 |
 |
 |
 |
 |
 |
 |

Brand Ambassador for


For Fellow Bloggers

|

|
 |
 |

Proud Recipient


About the Blog Author

City girl moves to the country, falls in love, and marries a farmer. She tries to incorporate her city ways with her new country lifestyle and blogs to keep in touch with friends, family & students who live far, far away :) Can this city girl go country? Watch as she learns all sorts of exciting things about life on the farm and in a small rural community. *UPDATE* We are now parents! Our baby girl was born on Nov. 11, 2008 (at 28 weeks gestation- 12 weeks premature, but she's quite the trooper)!!!

Les Boutons!


Let's Connect


Subscribe To


 Posts
All Comments
Posts
All Comments

Support


